Harbor是一个用于存储和分发Docker镜像的企业级Registry服务器,可以用来构建企业内部的Docker镜像仓库。它在Docker的开源项目 Distribution的基础上,添加了一些企业需要的功能特性,如镜像同步复制、漏洞扫描和权限管理等。Harbor是由VMware公司开源的企业级的Docker Registry管理项目,它包括权限管理(RBAC)、LDAP、日志审核、管理界面、自我注册、镜像复制和中文支持等功能。
搭建一个全功能的仓库,且支持匿名拉取
[root@server1 mnt]# cd compose/
[root@server1 compose]# ls
docker-compose-Linux-x86_64-1.16.1  docker-compose-Linux-x86_64-1.24.1
docker-compose-Linux-x86_64-1.22.0  docker-compose-Linux-x86_64-1.27.0
[root@server1 compose]# mv docker-compose-Linux-x86_64-1.27.0 /usr/local/bin/docker-compose
[root@server1 compose]# chmod +x /usr/local/bin/docker-compose
[root@server1 mnt]# tar zxf harbor-offline-installer-v1.10.1.tgz
解决依赖性,解压harbor
在harbor的目录中
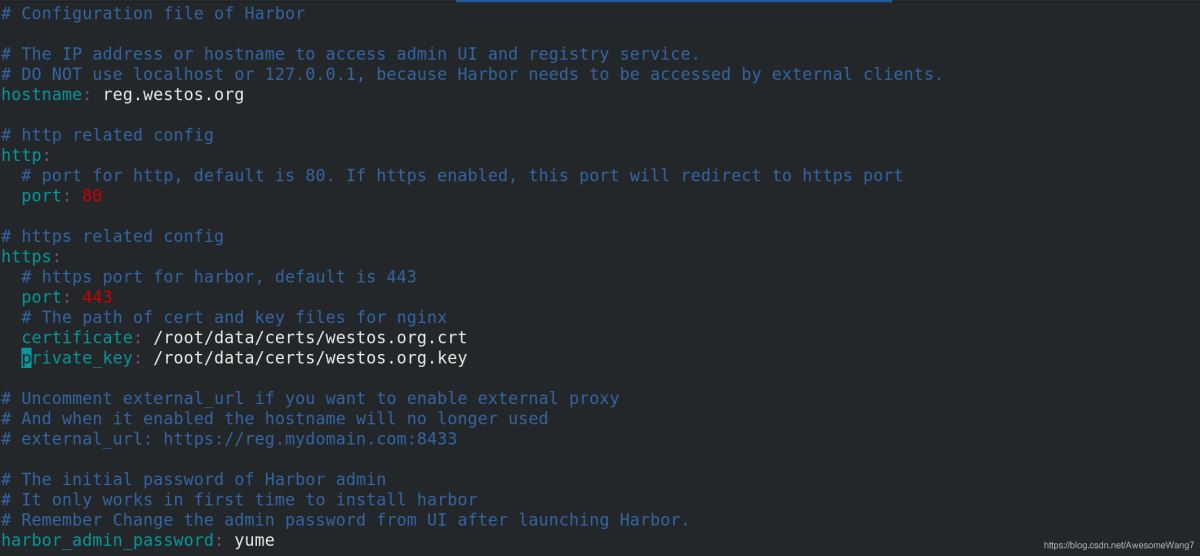
认证和密钥的位置一定要写对
执行脚本安装
Creating redis         ... done
Creating harbor-core   ... done
Creating nginx             ... done
Creating harbor-jobservice ... done
✔ ----Harbor has been installed and started successfully.----
done
[root@server1 harbor]# docker-compose
docker-compose命令一定要在harbor目录中执行
[root@server1 harbor]# docker-compose start
[root@server1 harbor]# docker-compose ps
      Name                     Command                  State                                        Ports
--------------------------------------------------------------------------------------------------------------------------------------------
harbor-core         /harbor/harbor_core              Up (healthy)
harbor-db           /docker-entrypoint.sh            Up (healthy)   5432/tcp
harbor-jobservice   /harbor/harbor_jobservice  ...   Up (healthy)
harbor-log          /bin/sh -c /usr/local/bin/ ...   Up (healthy)   127.0.0.1:1514->10514/tcp
harbor-portal       nginx -g daemon off;             Up (healthy)   8080/tcp
nginx               nginx -g daemon off;             Up (healthy)   0.0.0.0:80->8080/tcp,:::80->8080/tcp,
                                                                    0.0.0.0:443->8443/tcp,:::443->8443/tcp
redis               redis-server /etc/redis.conf     Up (healthy)   6379/tcp
registry            /home/harbor/entrypoint.sh       Up (healthy)   5000/tcp
registryctl         /home/harbor/start.sh            Up (healthy)
确保镜像都是up的状态
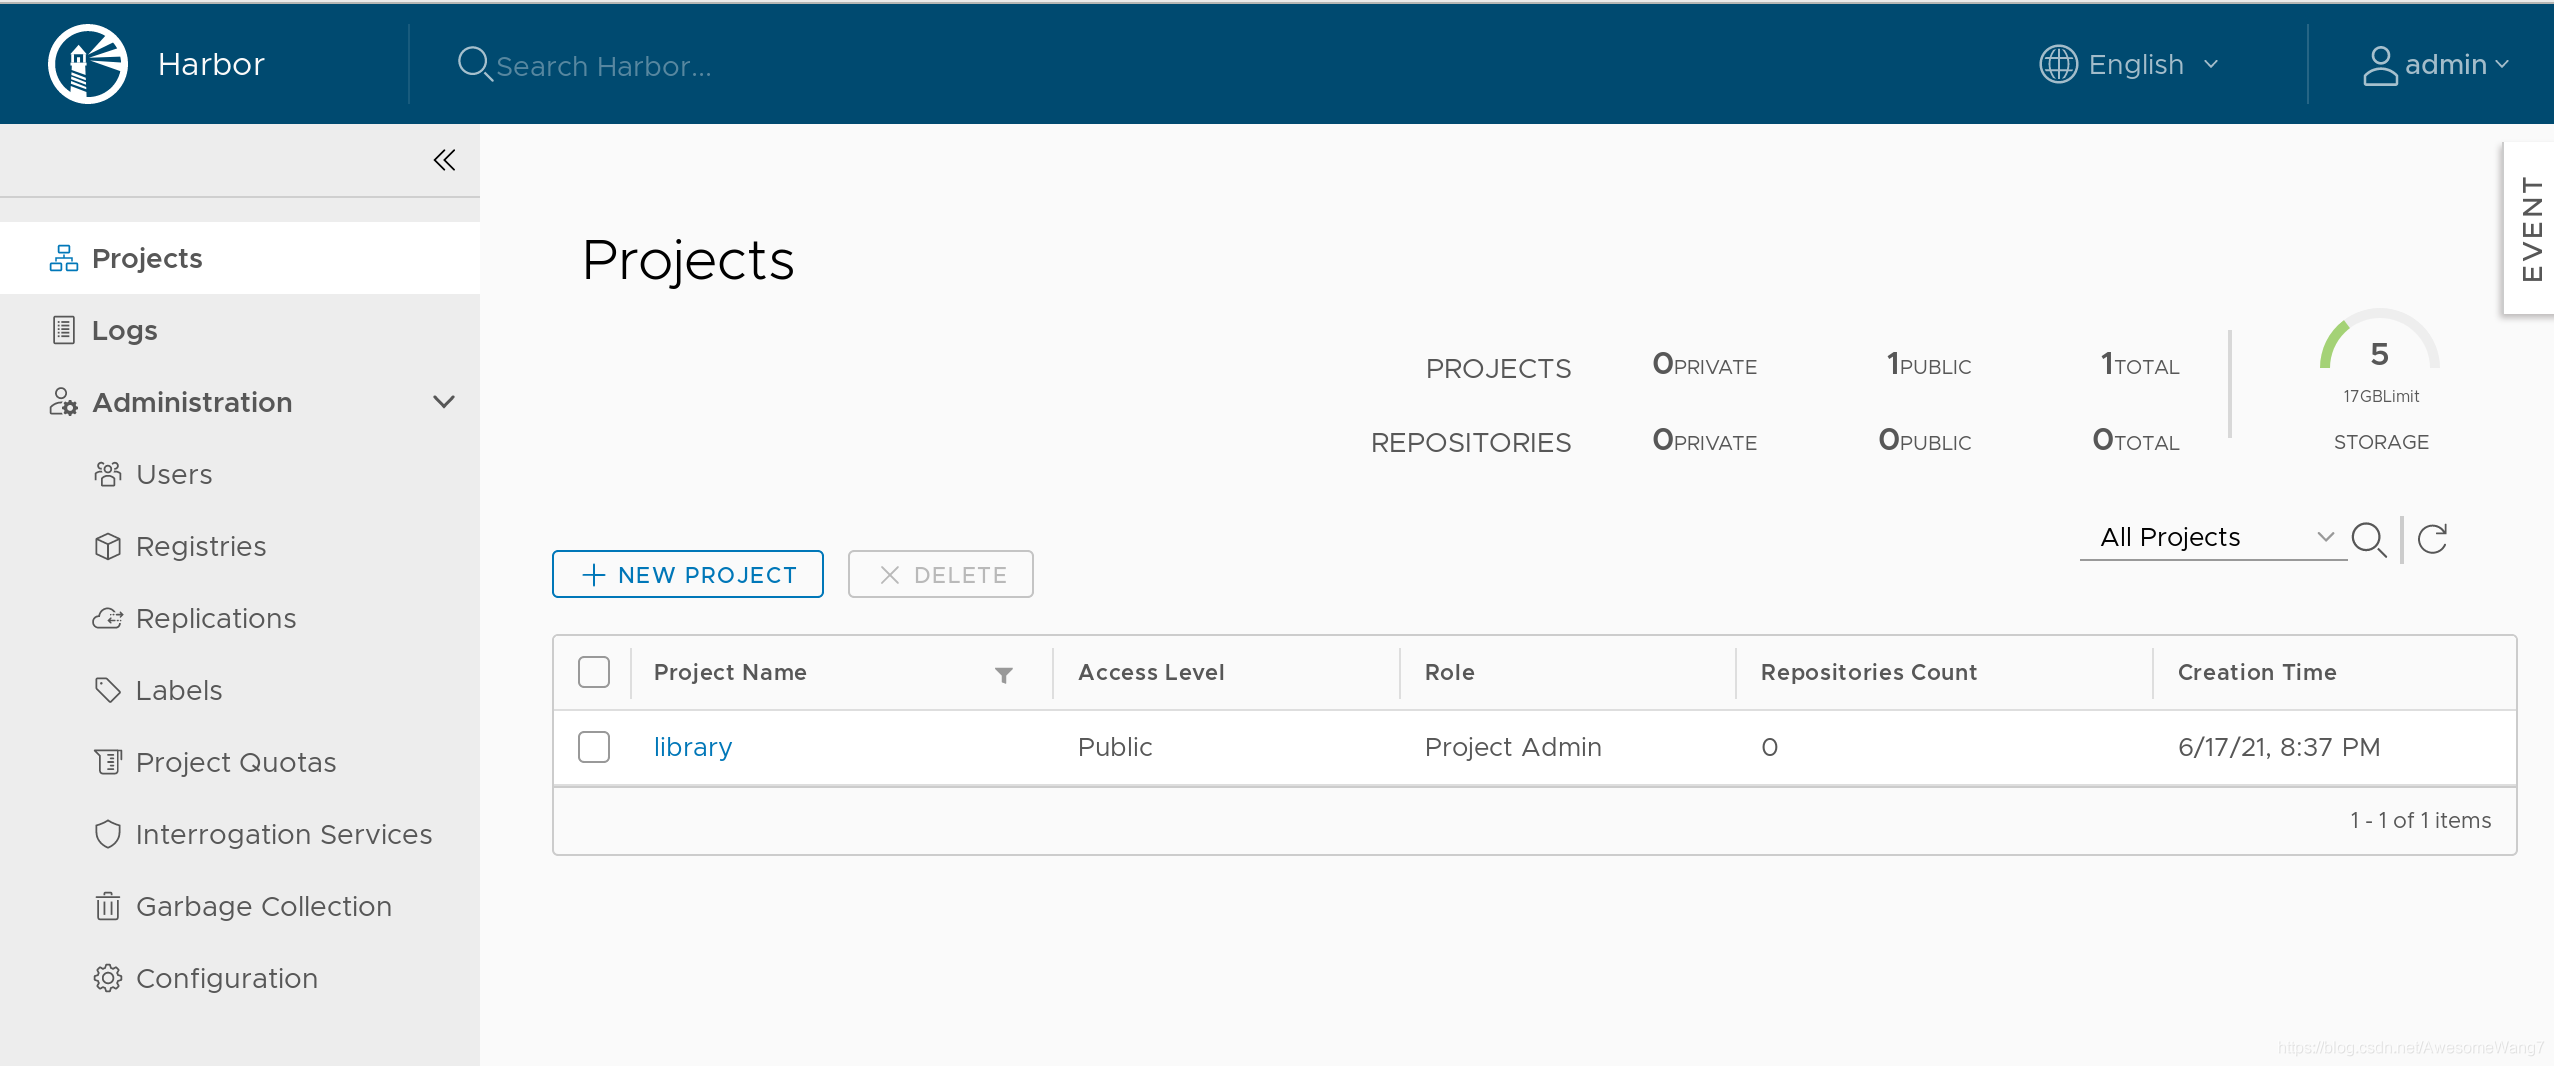
直接在浏览器输入IP地址
用户admin,密码yume
[root@server1 docker]# docker logout reg.westos.org
Removing login credentials for reg.westos.org
[root@server1 docker]# docker login reg.westos.org
Username: admin
Password:
WARNING! Your password will be stored unencrypted in /root/.docker/config.json.
Configure a credential helper to remove this warning. See
https://docs.docker.com/engine/reference/commandline/login/#credentials-store

Login Succeeded
退出之前的登录,重新登录
这是在数据库里保存的信息。
并非之前自己在本地创建的
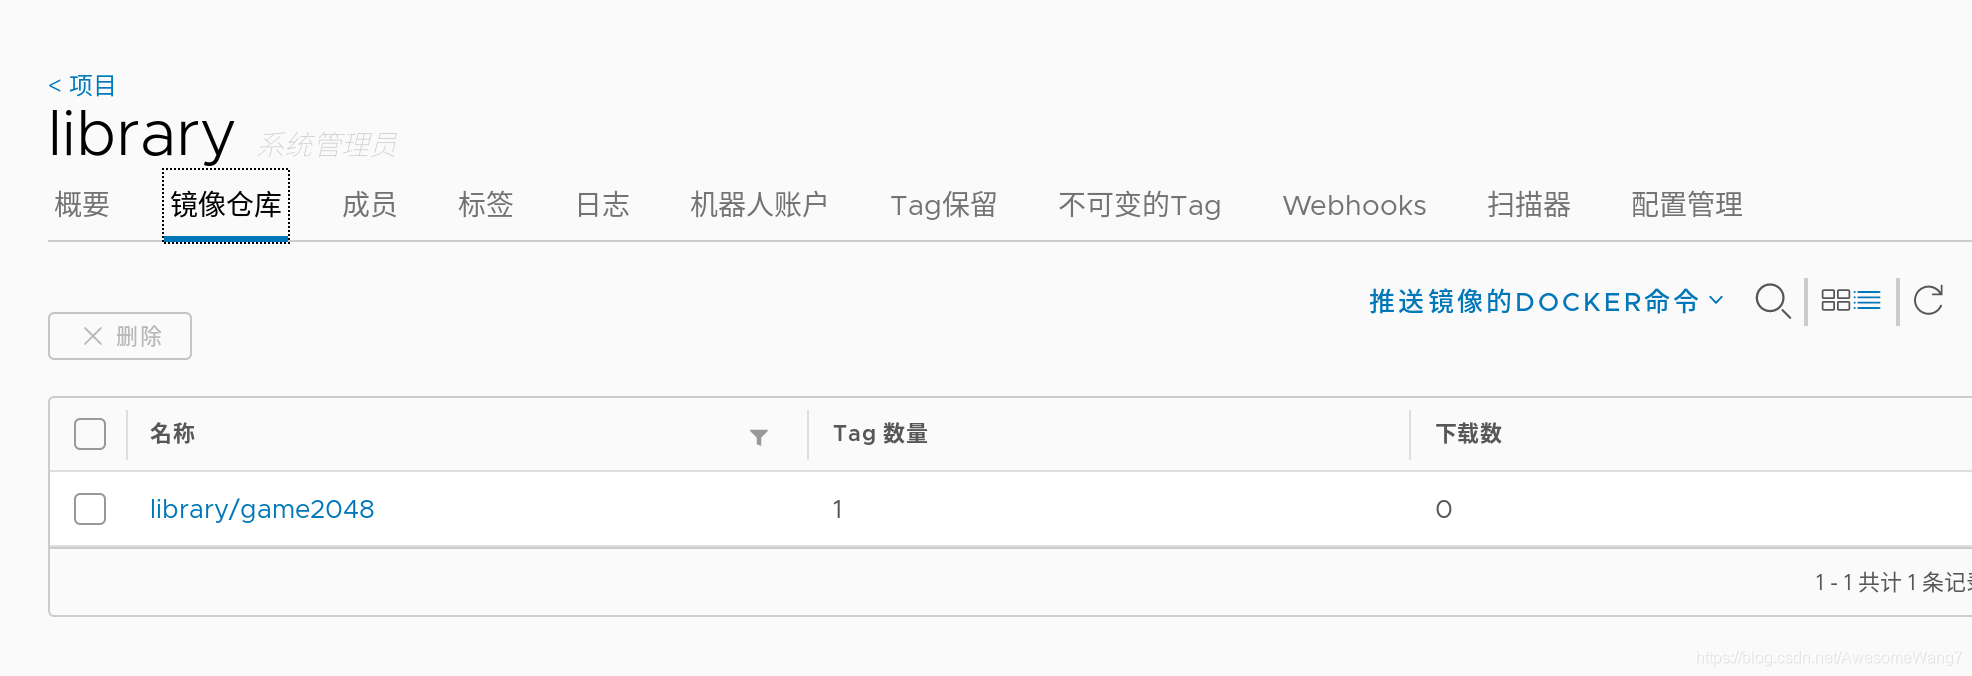
[root@server1 docker]# docker tag yakexi007/game2048:latest reg.westos.org/library/game2048:latest
[root@server1 docker]# docker push reg.westos.org/library/game2048:latest
The push refers to repository [reg.westos.org/library/game2048]
88fca8ae768a: Pushed
6d7504772167: Pushed
192e9fad2abc: Pushed
36e9226e74f8: Pushed
011b303988d2: Pushed
latest: digest: sha256:8a34fb9cb168c420604b6e5d32ca6d412cb0d533a826b313b190535c03fe9390 size: 1364
给仓库上传,查看
[root@server2 docker]# cat daemon.json
{
  "registry-mirrors": ["https://reg.westos.org"]
}
server2中,已经指向了私有仓库
Registry: https://index.docker.io/v1/
 Labels:
 Experimental: false
 Insecure Registries:
  127.0.0.0/8
 Registry Mirrors:
  https://reg.westos.org/
 Live Restore Enabled: false
且是生效的
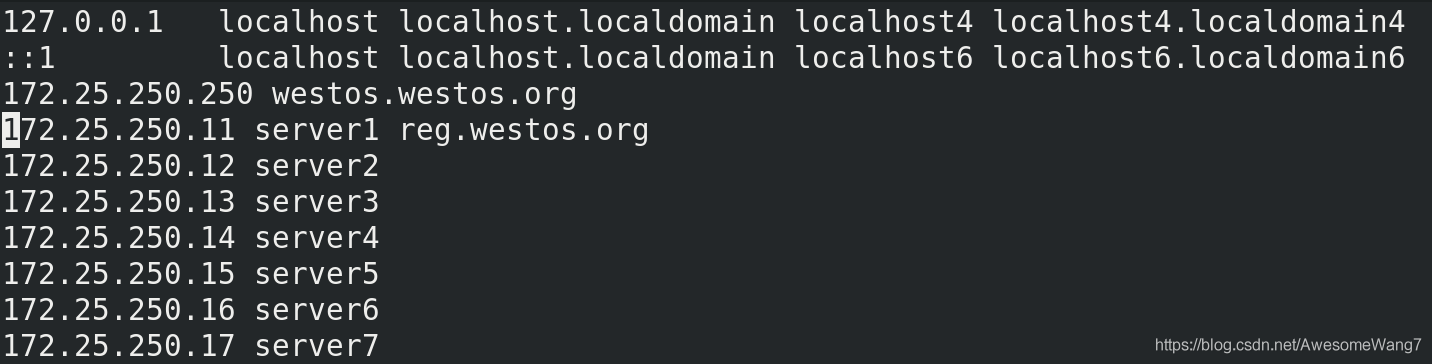
在server2中做地址解析
[root@server2 docker]# docker pull reg.westos.org/library/game2048:latest
latest: Pulling from library/game2048
534e72e7cedc: Pull complete
f62e2f6dfeef: Pull complete
fe7db6293242: Pull complete
3f120f6a2bf8: Pull complete
4ba4e6930ea5: Pull complete
Digest: sha256:8a34fb9cb168c420604b6e5d32ca6d412cb0d533a826b313b190535c03fe9390
Status: Downloaded newer image for reg.westos.org/library/game2048:latest
reg.westos.org/library/game2048:latest
把server1push出去的镜像在server2pull下来
成功
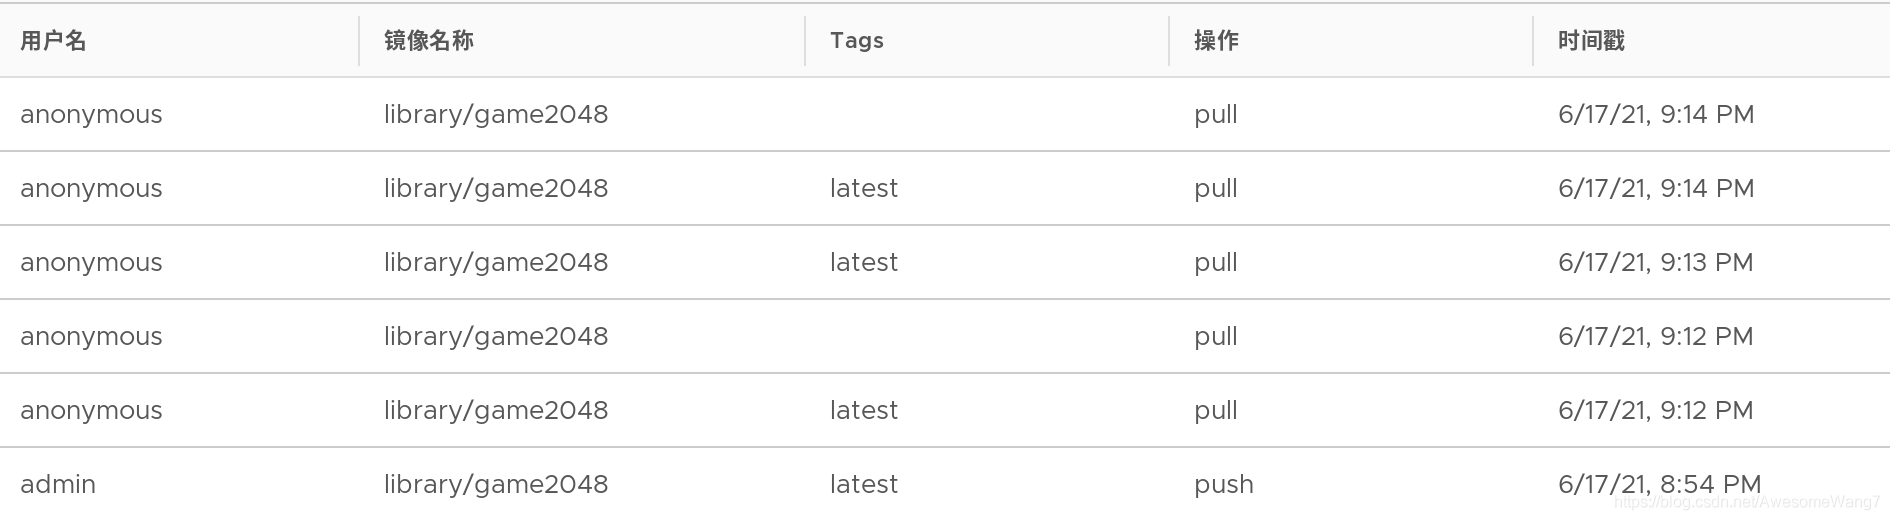
日志中可以看到,匿名用户进行了拉取
[root@server1 docker]# docker tag yakexi007/nginx:latest reg.westos.org/library/nginx:latest
[root@server1 docker]# docker push reg.westos.org/library/nginx
The push refers to repository [reg.westos.org/library/nginx]
3bd8699f28ba: Pushed
1d3b68b6972f: Pushed
de1602ca36c9: Pushed
latest: digest: sha256:5ea5a786e978abd8e6e0b6c0f37f7271be19c40d6b8247b1d9dae70c1fbab9eb size: 949
server1中再次上传一个nginx镜像

可以查看到
[root@server2 docker]# docker pull nginx
Using default tag: latest
latest: Pulling from library/nginx
cfb92865f5ba: Pull complete
8dd350b5e0d5: Pull complete
15157df2751c: Pull complete
Digest: sha256:5ea5a786e978abd8e6e0b6c0f37f7271be19c40d6b8247b1d9dae70c1fbab9eb
Status: Downloaded newer image for nginx:latest
docker.io/library/nginx:latest
server2再次拉取nginx,done
2.使用harbor仓库,一些基本的指令
[root@server1 harbor]# docker-compose logs
查看日志
[root@server1 harbor]# docker-compose stop
停用仓库
3.维护仓库(添加仓库模块:自动扫描镜像、签名功能)
先停掉仓库stop
[root@server1 harbor]# docker-compose rm
删除所有的容器
接下来,添加harbor的功能
查看安装脚本的help,可以看到3个模块:镜像漏洞扫描,内容信任,远程登陆
在安装脚本后面加上模块名称,重新安装后,会开启这些模块功能
[root@server1 harbor]# ./install.sh --help

Note: Please set hostname and other necessary attributes in harbor.yml first. DO NOT use localhost or 127.0.0.1 for hostname, because Harbor needs to be accessed by external clients.
Please set --with-notary if needs enable Notary in Harbor, and set ui_url_protocol/ssl_cert/ssl_cert_key in harbor.yml bacause notary must run under https.
Please set --with-clair if needs enable Clair in Harbor
Please set --with-chartmuseum if needs enable Chartmuseum in Harbor
[root@server1 harbor]# ./install.sh --with-notary --with-clair --with-chartmuseum
[Step 5]: starting Harbor ...
Creating network "harbor_harbor-clair" with the default driver
Creating network "harbor_harbor-notary" with the default driver
Creating network "harbor_harbor-chartmuseum" with the default driver
Creating network "harbor_notary-sig" with the default driver
Creating harbor-log ... done
Creating registry      ... done
Creating harbor-db     ... done
Creating registryctl   ... done
Creating redis         ... done
Creating chartmuseum   ... done
Creating harbor-portal ... done
Creating harbor-core   ... done
Creating notary-signer ... done
Creating clair         ... done
Creating clair-adapter     ... done
Creating notary-server     ... done
Creating nginx             ... done
Creating harbor-jobservice ... done
✔ ----Harbor has been installed and started successfully.----
[root@server1 harbor]# docker-compose ps
      Name                     Command                       State                                        Ports
--------------------------------------------------------------------------------------------------------------------------------------------
chartmuseum         ./docker-entrypoint.sh           Up (health: starting)   9999/tcp
clair               ./docker-entrypoint.sh           Up (health: starting)   6060/tcp, 6061/tcp
clair-adapter       /clair-adapter/clair-adapter     Up (health: starting)   8080/tcp
harbor-core         /harbor/harbor_core              Up (health: starting)
harbor-db           /docker-entrypoint.sh            Up (health: starting)   5432/tcp
harbor-jobservice   /harbor/harbor_jobservice  ...   Up (health: starting)
harbor-log          /bin/sh -c /usr/local/bin/ ...   Up (health: starting)   127.0.0.1:1514->10514/tcp
harbor-portal       nginx -g daemon off;             Up (health: starting)   8080/tcp
nginx               nginx -g daemon off;             Up (health: starting)   0.0.0.0:4443->4443/tcp,:::4443->4443/tcp,
                                                                             0.0.0.0:80->8080/tcp,:::80->8080/tcp,
                                                                             0.0.0.0:443->8443/tcp,:::443->8443/tcp
notary-server       /bin/sh -c migrate-patch - ...   Up
notary-signer       /bin/sh -c migrate-patch - ...   Up
redis               redis-server /etc/redis.conf     Up (health: starting)   6379/tcp
registry            /home/harbor/entrypoint.sh       Up (health: starting)   5000/tcp
registryctl         /home/harbor/start.sh            Up (health: starting)
用ps查看,会发现多了一些功能
登录172.25.250.11
这些都是重新安装前没有的
–with-notary --with-clair --with-chartmuseum
分别是内容信任,镜像扫描和charts库
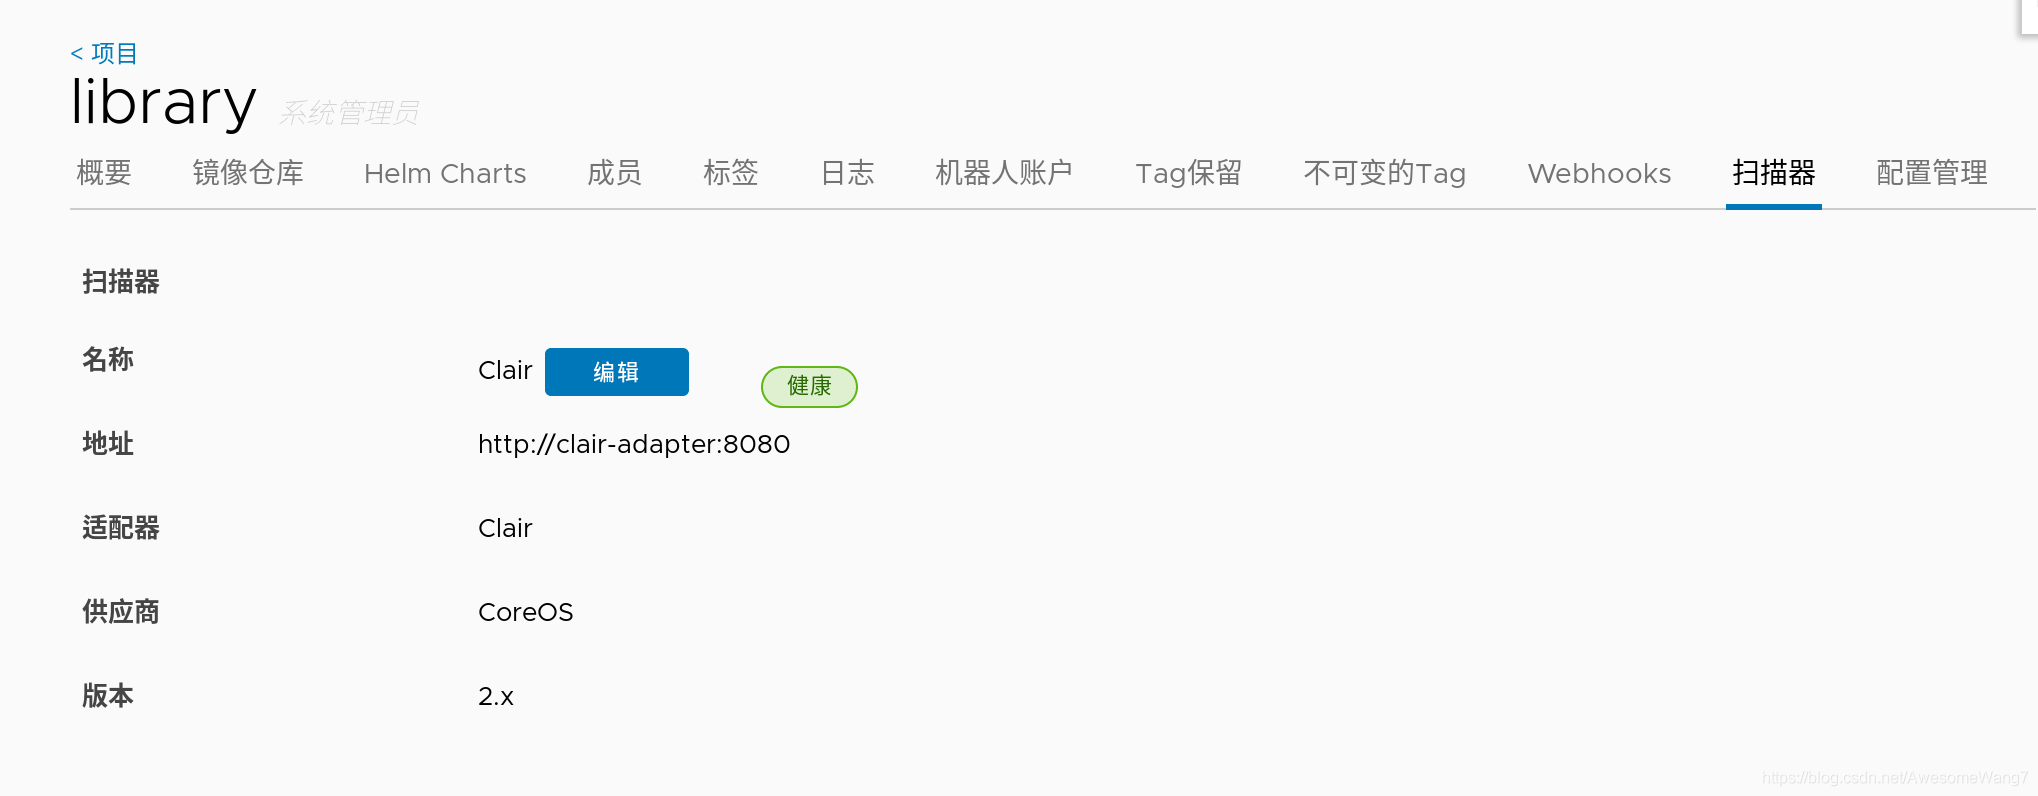
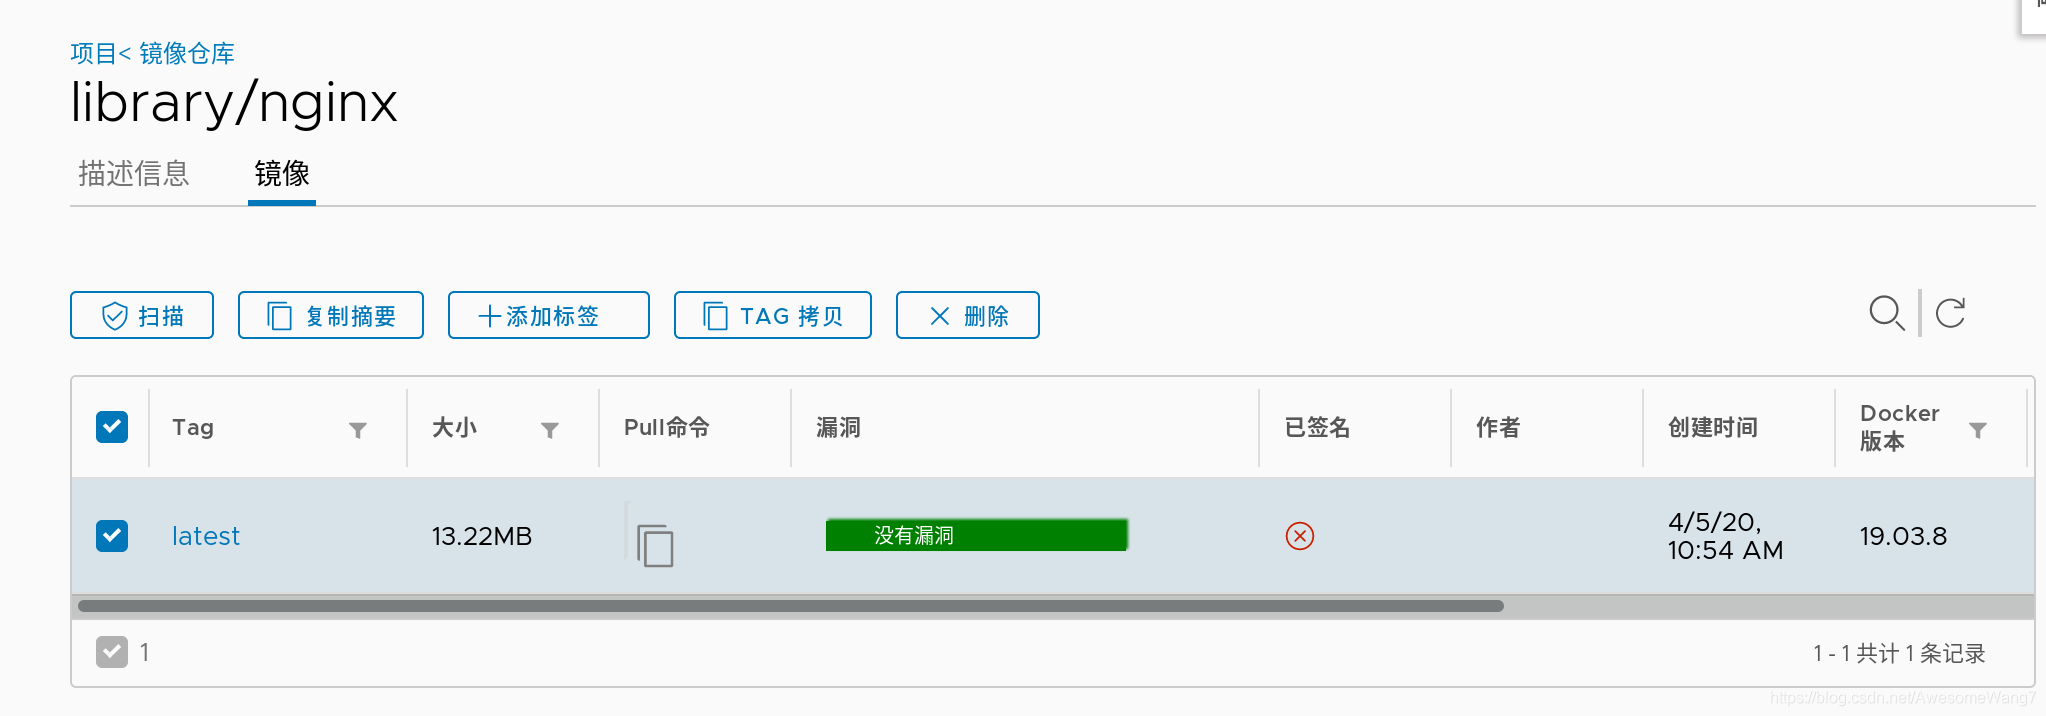
在浏览器查看镜像的信息
此时,可以看到镜像后面都跟有扫描、签名等信息
因为,配置这个目录时,没有开启镜像扫描和签名功能,所以,当前显示镜像是无扫描和无签名的
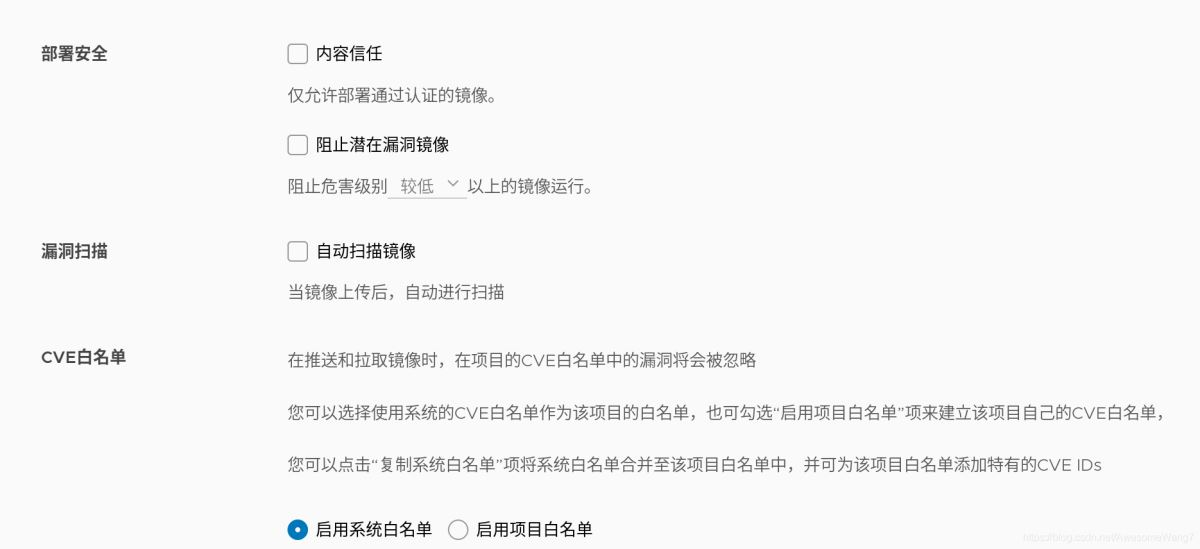
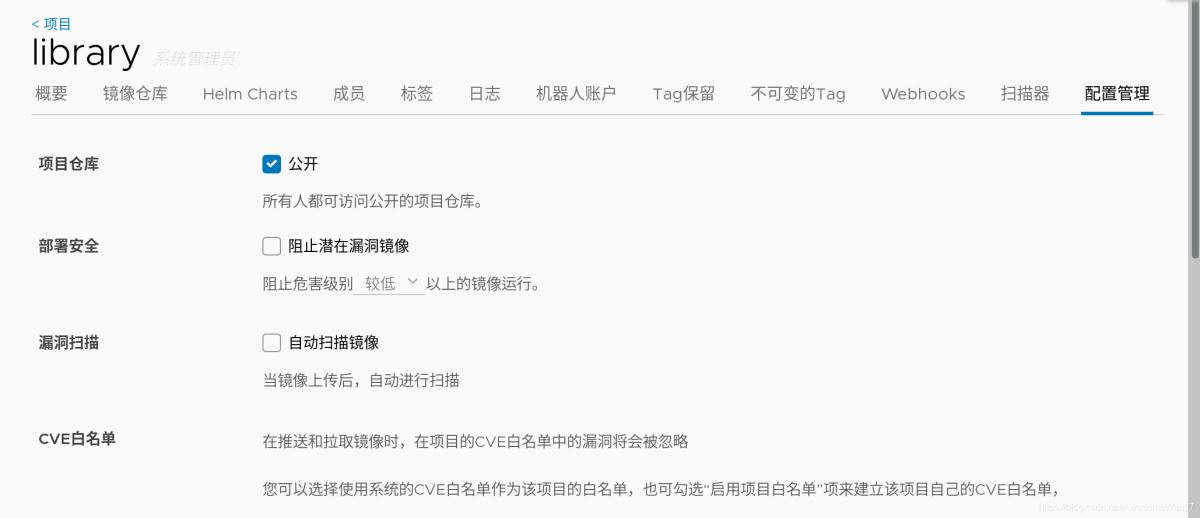
如何自动扫描镜像?

选中记得保存
尝试一下,重新上传一个镜像试试
[root@server1 harbor]# docker tag rhel7:latest reg.westos.org/library/rhel7:latest
这次用rhel7的镜像,先改一个名字
[root@server1 harbor]# docker push reg.westos.org/library/rhel7:latest
The push refers to repository [reg.westos.org/library/rhel7]
18af9eb19b5f: Pushed
latest: digest: sha256:58cd9120a4194edb0de4377b71bd564953255a1422baa1bbd9cb23d521c6873b size: 528
上传到harbor
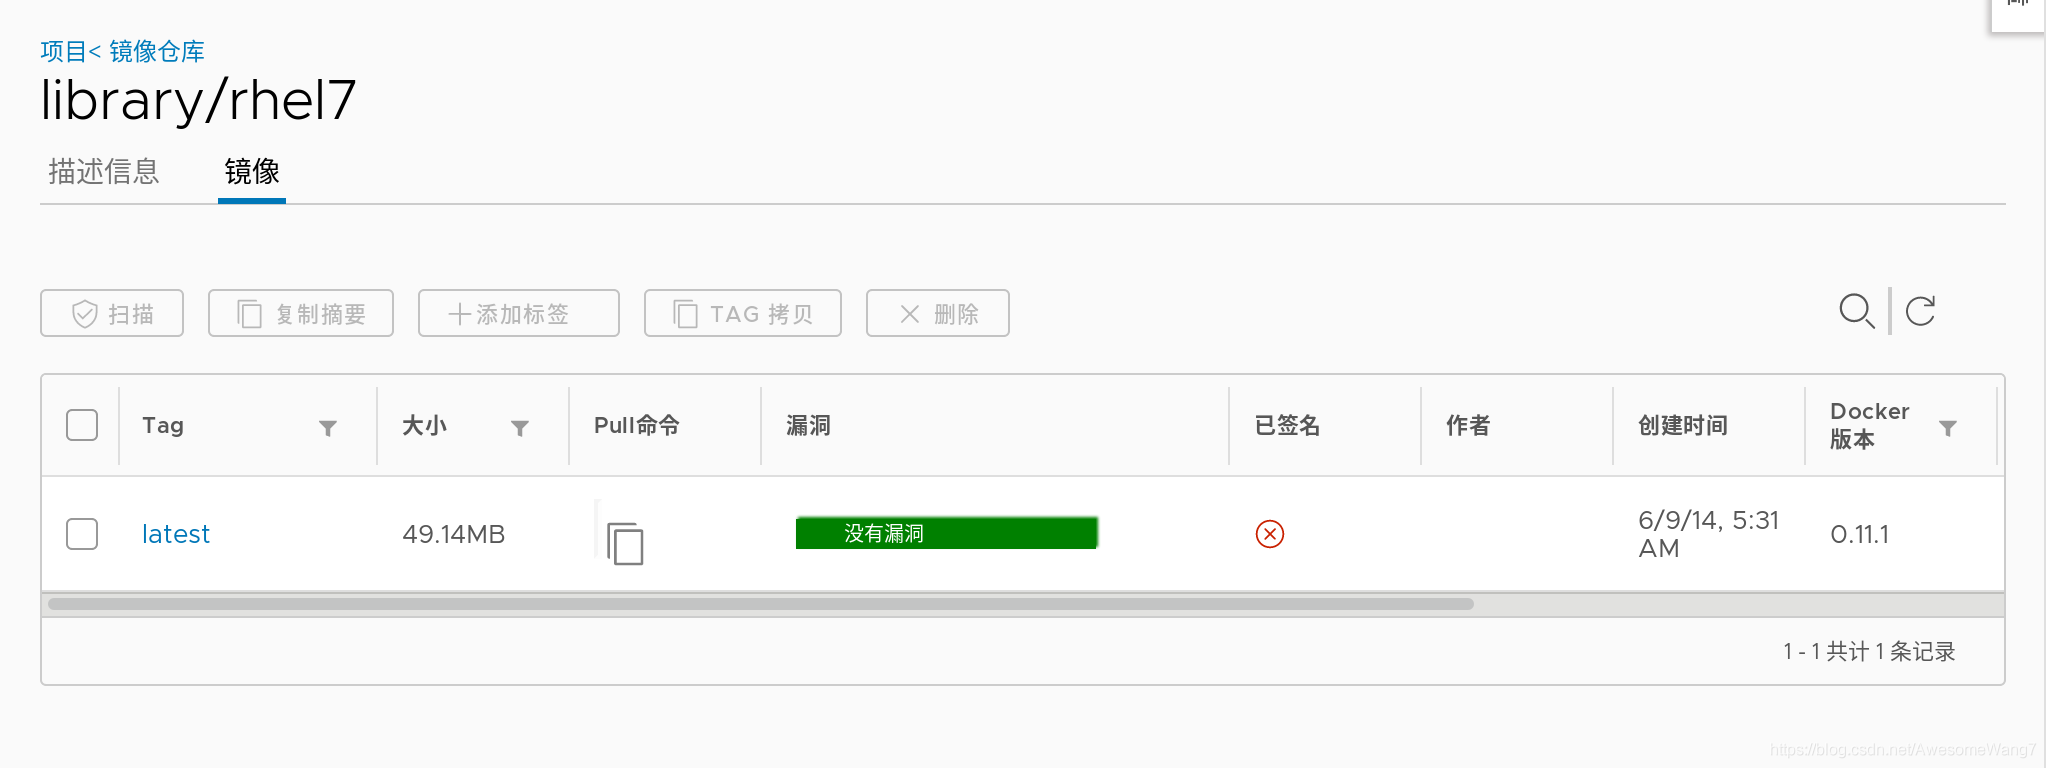
当打开浏览器时,发现已经自动扫描过了
如何实现镜像签名功能?

当选中了内容信任,此时在server2尝试拉取刚才上传的rhel7镜像
[root@server2 ~]# docker pull rhel7
Using default tag: latest
Error response from daemon: pull access denied for rhel7, repository does not exist or may require 'docker login': denied: requested access to the resource is denied
如果取消选中内容信任就可以正常拉取
因为仓库开启了内容信任功能,客户端只能下载具有签名的镜像,而现在仓库中的debian镜像没有签名,因此,客户端拉取失败。
虽然拉取harbor仓库失败,但是,系统会自动到互联网上去拉取镜像(现在处于未联网的环境,所以,出现以上错误)
现在要给信任的镜像签名授权
先在Web界面删除之前上传的,没有签名的镜像
在Docker的服务端设置2个环境变量,即可使用内容信任功能为上传的镜像进行签名
(1)部署根证书
[root@server1 harbor]# docker-compose ps
      Name                     Command                  State                                        Ports
--------------------------------------------------------------------------------------------------------------------------------------------
chartmuseum         ./docker-entrypoint.sh           Up (healthy)   9999/tcp
clair               ./docker-entrypoint.sh           Up (healthy)   6060/tcp, 6061/tcp
clair-adapter       /clair-adapter/clair-adapter     Up (healthy)   8080/tcp
harbor-core         /harbor/harbor_core              Up (healthy)
harbor-db           /docker-entrypoint.sh            Up (healthy)   5432/tcp
harbor-jobservice   /harbor/harbor_jobservice  ...   Up (healthy)
harbor-log          /bin/sh -c /usr/local/bin/ ...   Up (healthy)   127.0.0.1:1514->10514/tcp
harbor-portal       nginx -g daemon off;             Up (healthy)   8080/tcp
nginx               nginx -g daemon off;             Up (healthy)   0.0.0.0:4443->4443/tcp,:::4443->4443/tcp,
                                                                    0.0.0.0:80->8080/tcp,:::80->8080/tcp,
                                                                    0.0.0.0:443->8443/tcp,:::443->8443/tcp
notary-server       /bin/sh -c migrate-patch - ...   Up
notary-signer       /bin/sh -c migrate-patch - ...   Up
redis               redis-server /etc/redis.conf     Up (healthy)   6379/tcp
registry            /home/harbor/entrypoint.sh       Up (healthy)   5000/tcp
registryctl         /home/harbor/start.sh            Up (healthy)
4443端口就是用来签名的
[root@server1 harbor]# export DOCKER_CONTENT_TRUST=1
[root@server1 harbor]# export DOCKER_CONTENT_TRUST_SERVER=https://reg.westos.org:4443
(2)启用docker内容信任
[root@server1 harbor]# docker push reg.westos.org/library/nginx:latest
The push refers to repository [reg.westos.org/library/nginx]
3bd8699f28ba: Layer already exists
1d3b68b6972f: Layer already exists
de1602ca36c9: Layer already exists
latest: digest: sha256:5ea5a786e978abd8e6e0b6c0f37f7271be19c40d6b8247b1d9dae70c1fbab9eb size: 949
Signing and pushing trust metadata
Error: error contacting notary server: x509: certificate signed by unknown authority
latest一定要加,这表明了版本的更新
(3)重新上传报错了,没有证书
在隐藏目录.docker中,创建证书目录tls,进入该目录后,创建和容器名称相同的目录reg.westos.org:4443。
复制之前生成好的证书到该目录中
[root@server1 ~]# cd .docker/
[root@server1 .docker]# ls
config.json  trust
[root@server1 .docker]# mkdir tls
[root@server1 .docker]# cd tls/
[root@server1 tls]# mkdir reg.westos.org:4443
[root@server1 tls]# cd reg.westos.org\:4443/
[root@server1 reg.westos.org:4443]# cp /docker /
.autorelabel  data/         etc/          lib64/        opt/          run/          sys/          var/
bin/          dev/          home/         media/        proc/         sbin/         tmp/
boot/         docker        lib/          mnt/          root/         srv/          usr/
[root@server1 reg.westos.org:4443]# cp /root/data/certs/westos.org.crt ca.crt
[root@server1 reg.westos.org:4443]# ls
ca.crt
(4)重新上传试试
[root@server1 harbor]# docker push reg.westos.org/library/nginx:latest
The push refers to repository [reg.westos.org/library/nginx]
3bd8699f28ba: Layer already exists
1d3b68b6972f: Layer already exists
de1602ca36c9: Layer already exists
latest: digest: sha256:5ea5a786e978abd8e6e0b6c0f37f7271be19c40d6b8247b1d9dae70c1fbab9eb size: 949
Signing and pushing trust metadata
You are about to create a new root signing key passphrase. This passphrase
will be used to protect the most sensitive key in your signing system. Please
choose a long, complex passphrase and be careful to keep the password and the
key file itself secure and backed up. It is highly recommended that you use a
password manager to generate the passphrase and keep it safe. There will be no
way to recover this key. You can find the key in your config directory.
Enter passphrase for new root key with ID dbac0cb:
Passphrase is too short. Please use a password manager to generate and store a good random passphrase.
Enter passphrase for new root key with ID dbac0cb:
Passphrase is too short. Please use a password manager to generate and store a good random passphrase.
Enter passphrase for new root key with ID dbac0cb:
Passphrase is too short. Please use a password manager to generate and store a good random passphrase.
Enter passphrase for new root key with ID dbac0cb:
Passphrase is too short. Please use a password manager to generate and store a good random passphrase.
Enter passphrase for new root key with ID dbac0cb:
Repeat passphrase for new root key with ID dbac0cb:
Enter passphrase for new repository key with ID a868e96:
Repeat passphrase for new repository key with ID a868e96:
Finished initializing "reg.westos.org/library/nginx"
Successfully signed reg.westos.org/library/nginx:latest
解决问题之后,服务端再去上传镜像,成功
上传新的镜像,需要管理员设置根key和仓库key
(注意,每次上传镜像的不同版本时,只需要输入对应的仓库key,不需要输入根key)
设定好之后,去Web界面查看,发现上传的镜像的签名处显示成功
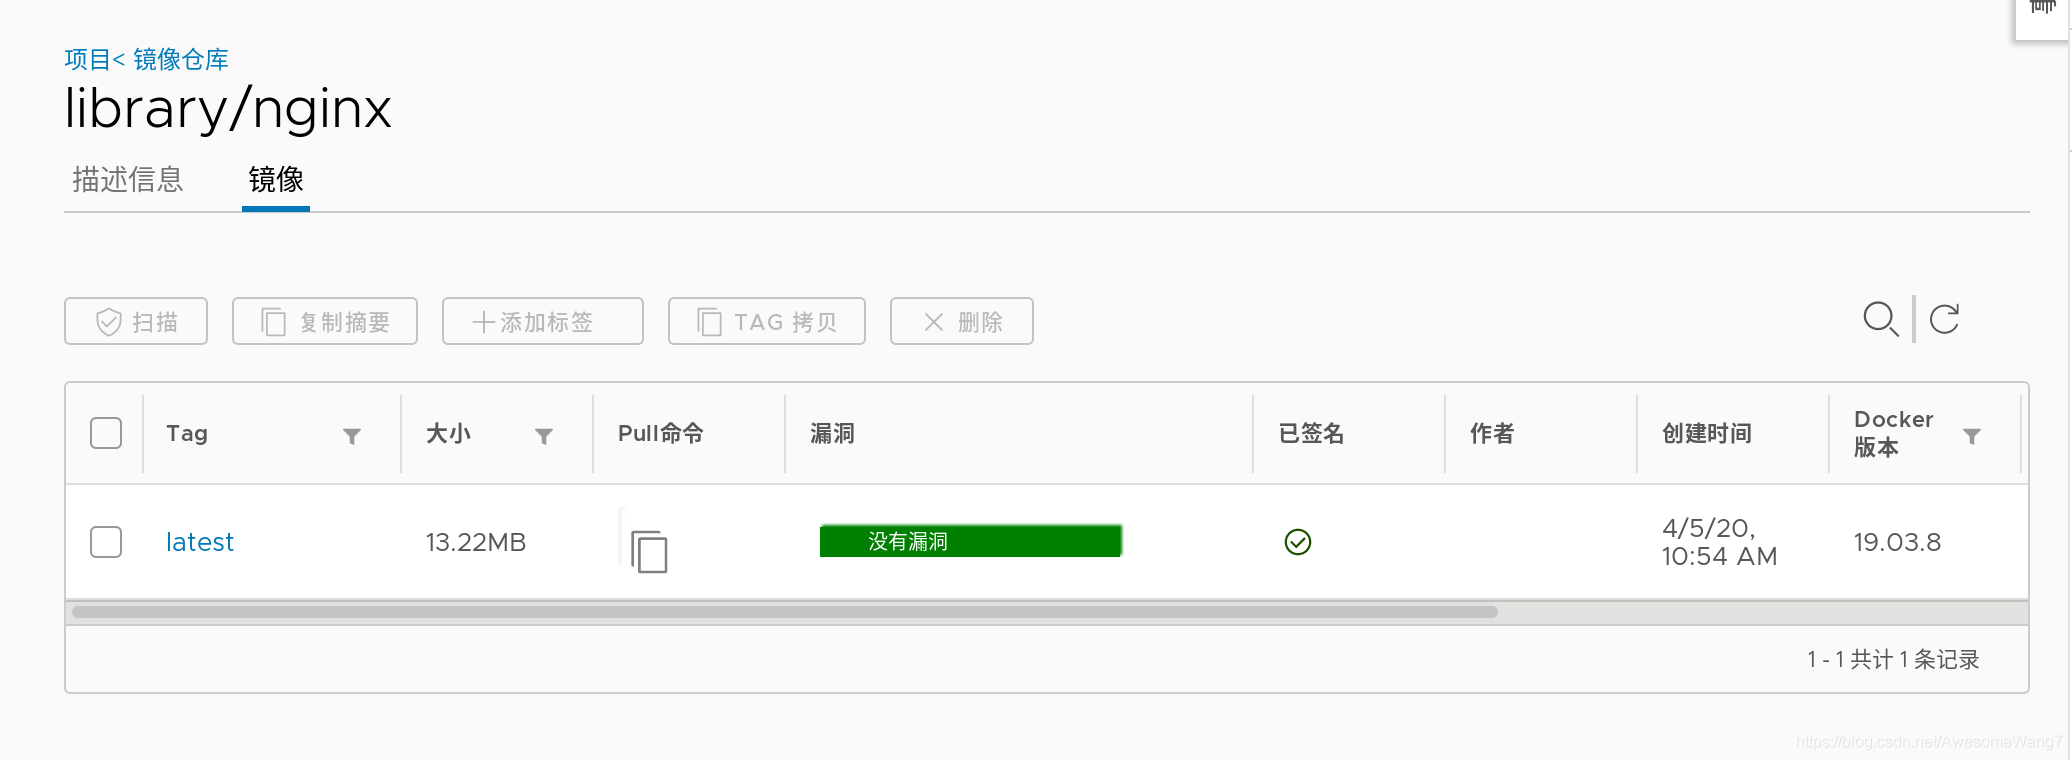
已签名,一定要加latest
[root@server2 ~]# docker pull nginx
Using default tag: latest
latest: Pulling from library/nginx
cfb92865f5ba: Pull complete
8dd350b5e0d5: Pull complete
15157df2751c: Pull complete
Digest: sha256:5ea5a786e978abd8e6e0b6c0f37f7271be19c40d6b8247b1d9dae70c1fbab9eb
Status: Downloaded newer image for nginx:latest
docker.io/library/nginx:latest
在server2拉取已签名的镜像没有问题,如果未签名还开启了内容信任,就还是不行
再次试试可行性,把2048先从harbor删掉,然后server2也删除之前下载的2048镜像,重新拉取,报错
[root@server2 ~]# docker pull game2048
Using default tag: latest
Error response from daemon: pull access denied for game2048, repository does not exist or may require 'docker login': denied: requested access to the resource is denied
然后server1重新push2048
[root@server1 harbor]# docker push reg.westos.org/library/game2048:latest
The push refers to repository [reg.westos.org/library/game2048]
88fca8ae768a: Layer already exists
6d7504772167: Layer already exists
192e9fad2abc: Layer already exists
36e9226e74f8: Layer already exists
011b303988d2: Layer already exists
latest: digest: sha256:8a34fb9cb168c420604b6e5d32ca6d412cb0d533a826b313b190535c03fe9390 size: 1364
Signing and pushing trust metadata
Enter passphrase for root key with ID dbac0cb:
Enter passphrase for new repository key with ID 18c8514:
Repeat passphrase for new repository key with ID 18c8514:
Finished initializing "reg.westos.org/library/game2048"
Successfully signed reg.westos.org/library/game2048:latest
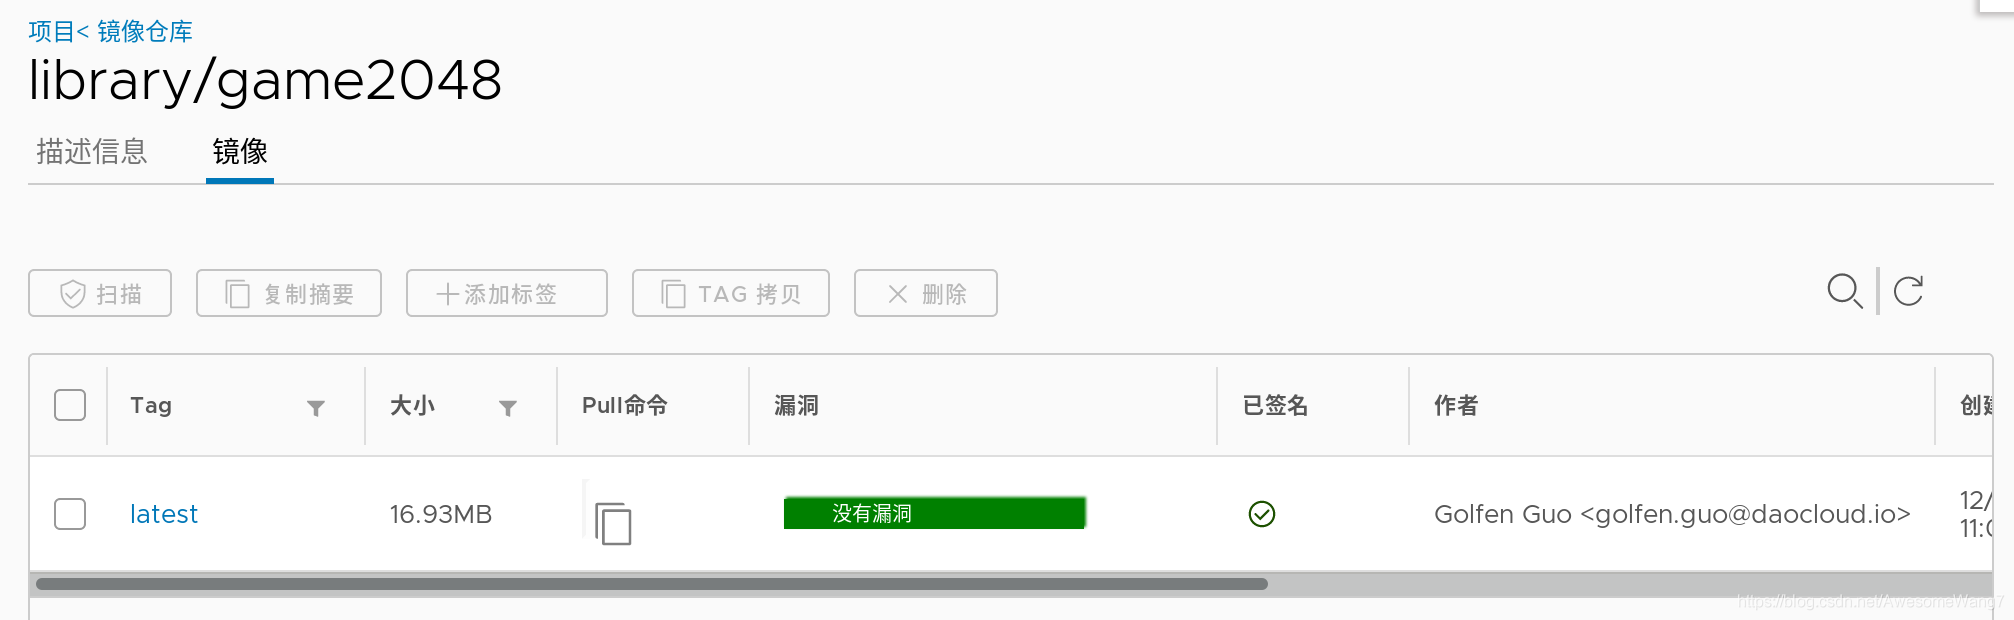
已经签名,此时server2再次pull
[root@server2 ~]# docker pull game2048
Using default tag: latest
latest: Pulling from library/game2048
534e72e7cedc: Pull complete
f62e2f6dfeef: Pull complete
fe7db6293242: Pull complete
3f120f6a2bf8: Pull complete
4ba4e6930ea5: Pull complete
Digest: sha256:8a34fb9cb168c420604b6e5d32ca6d412cb0d533a826b313b190535c03fe9390
Status: Downloaded newer image for game2048:latest
docker.io/library/game2048:latest
done
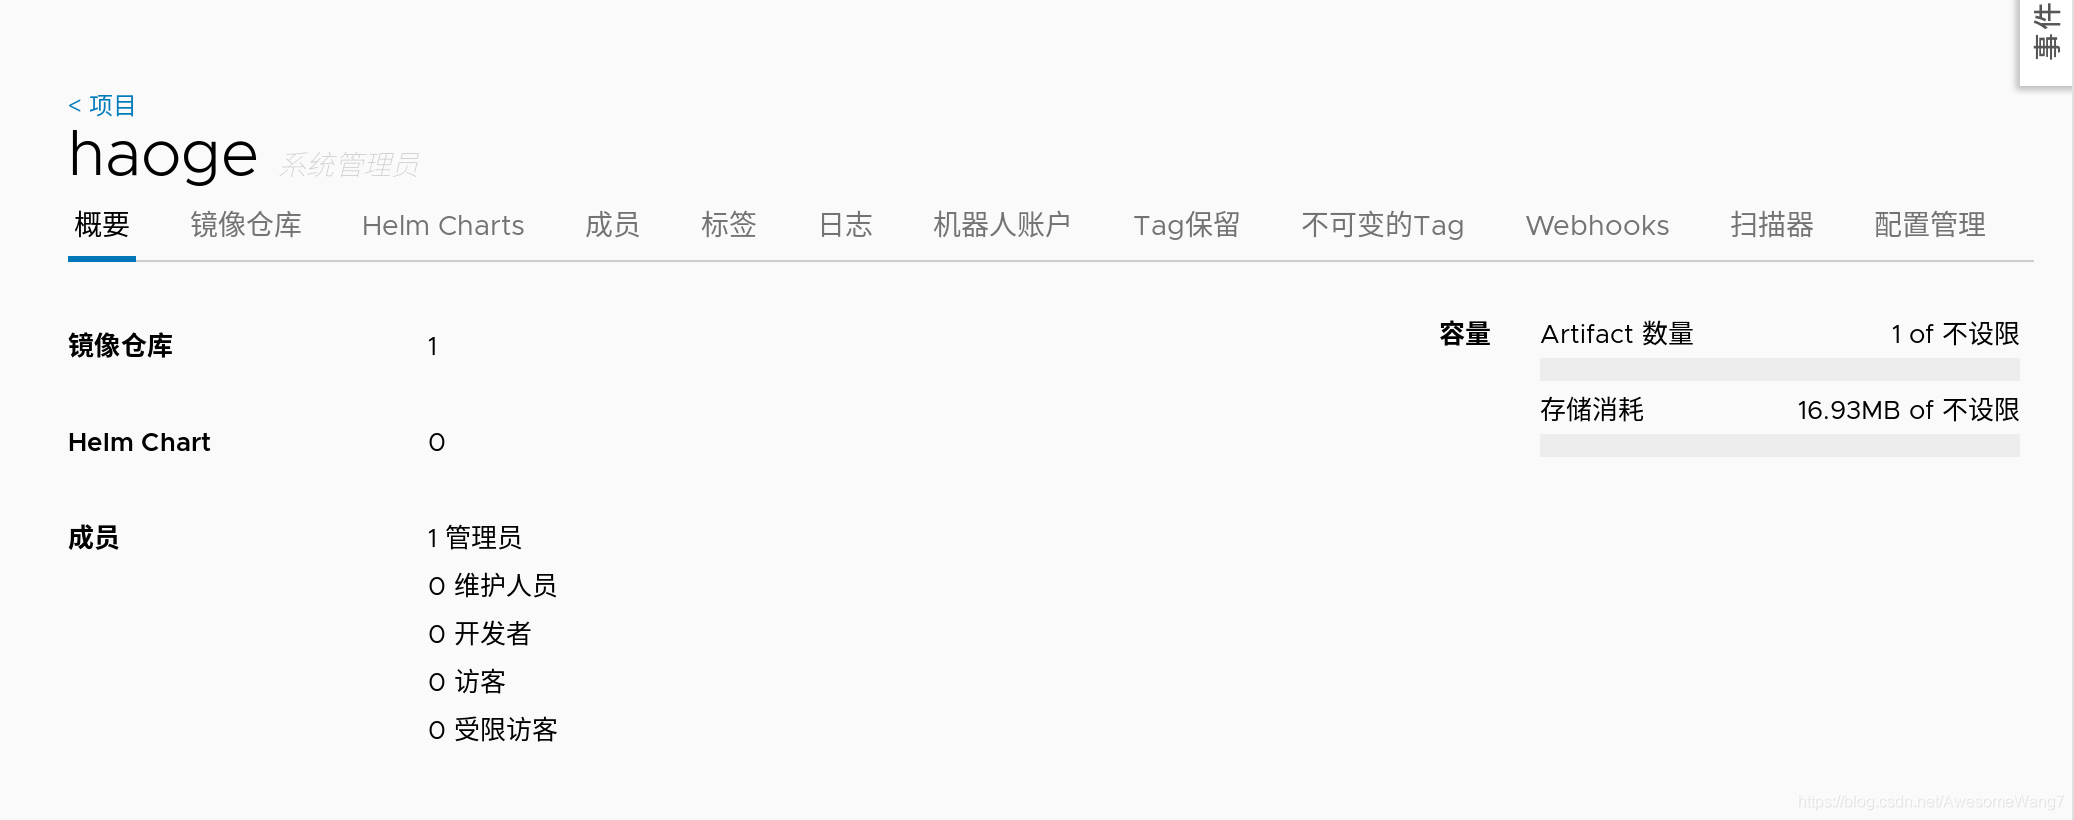
4.guest用户访问未公开仓库
(1)新建一个项目
[root@server1 harbor]# export DOCKER_CONTENT_TRUST=0
把内容信任关闭掉,不然会麻烦
[root@server1 harbor]# docker tag reg.westos.org/library/game2048:latest reg.westos.org/haoge/game2048:latest
[root@server1 harbor]# docker push reg.westos.org/haoge/game2048
给haoge这个新项目重新上传一个2048镜像

[root@server2 ~]# docker pull  reg.westos.org/haoge/game2048:latest
Error response from daemon: pull access denied for reg.westos.org/haoge/game2048, repository does not exist or may require 'docker login': denied: requested access to the resource is denied
server2拉取haoge下的2048,报错了,需要login
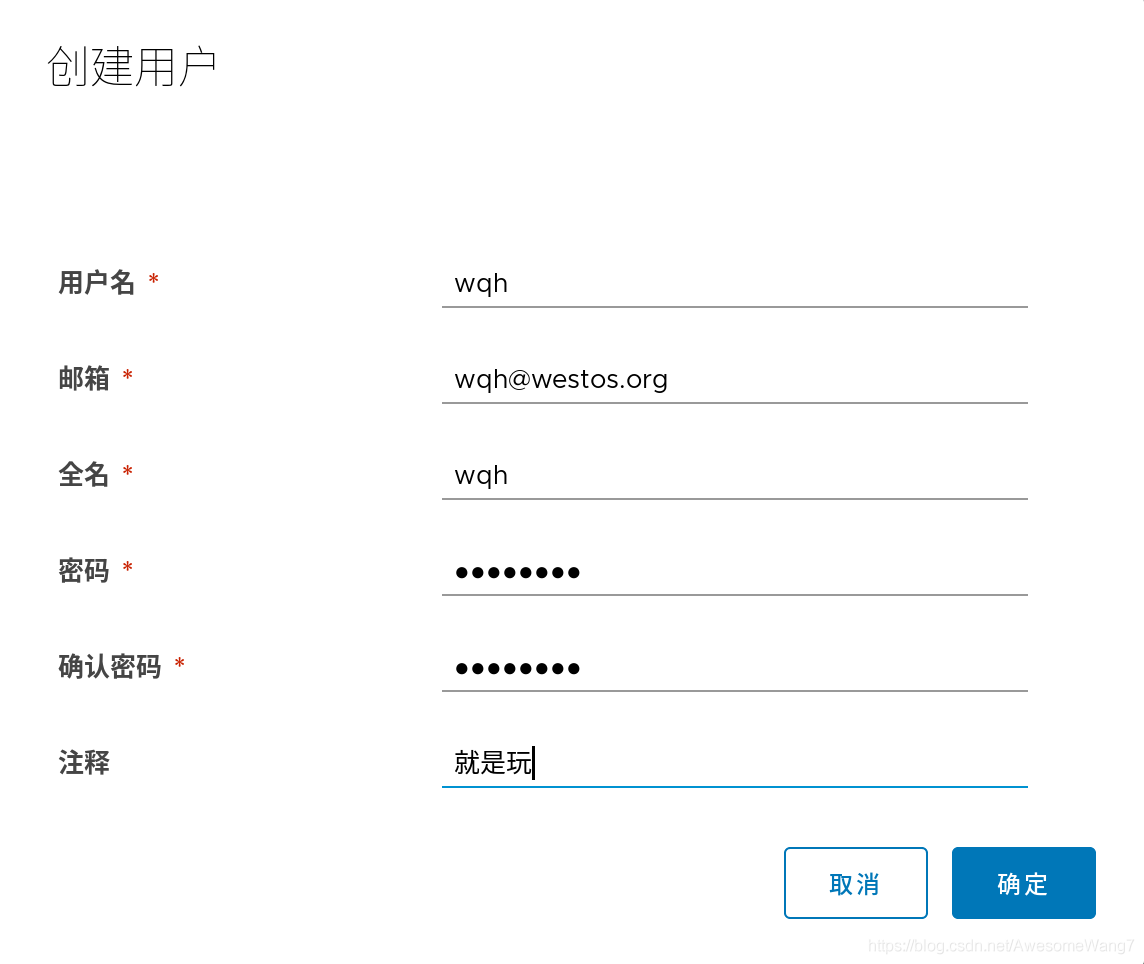
新建一个用户
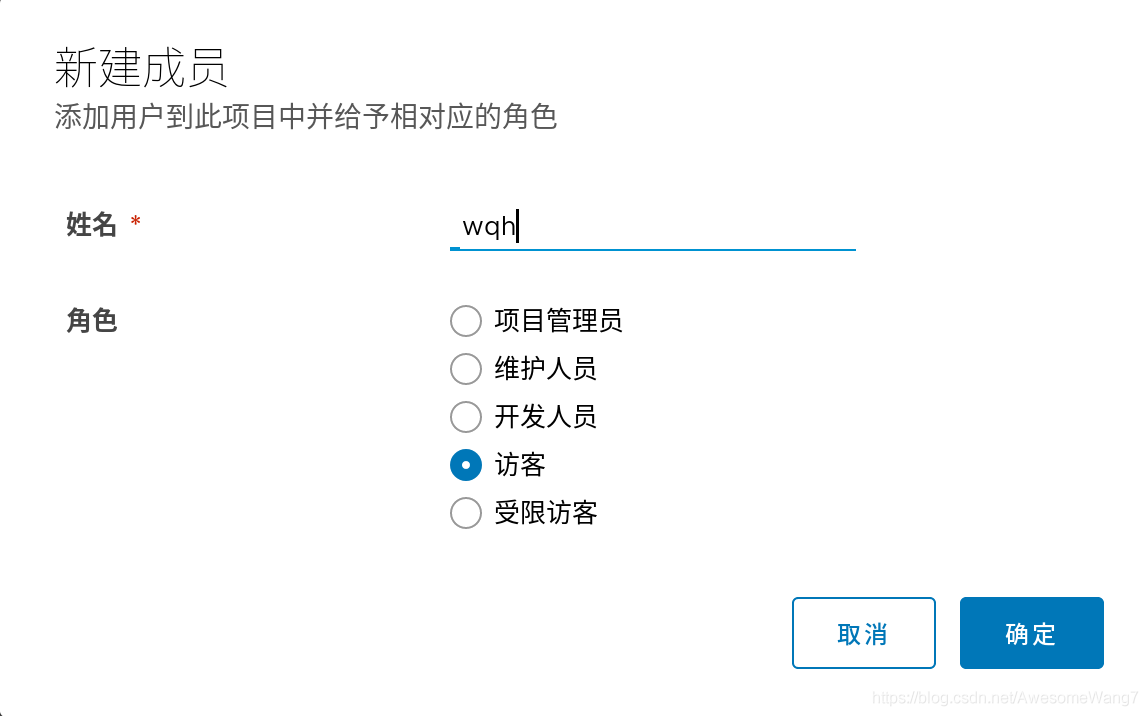
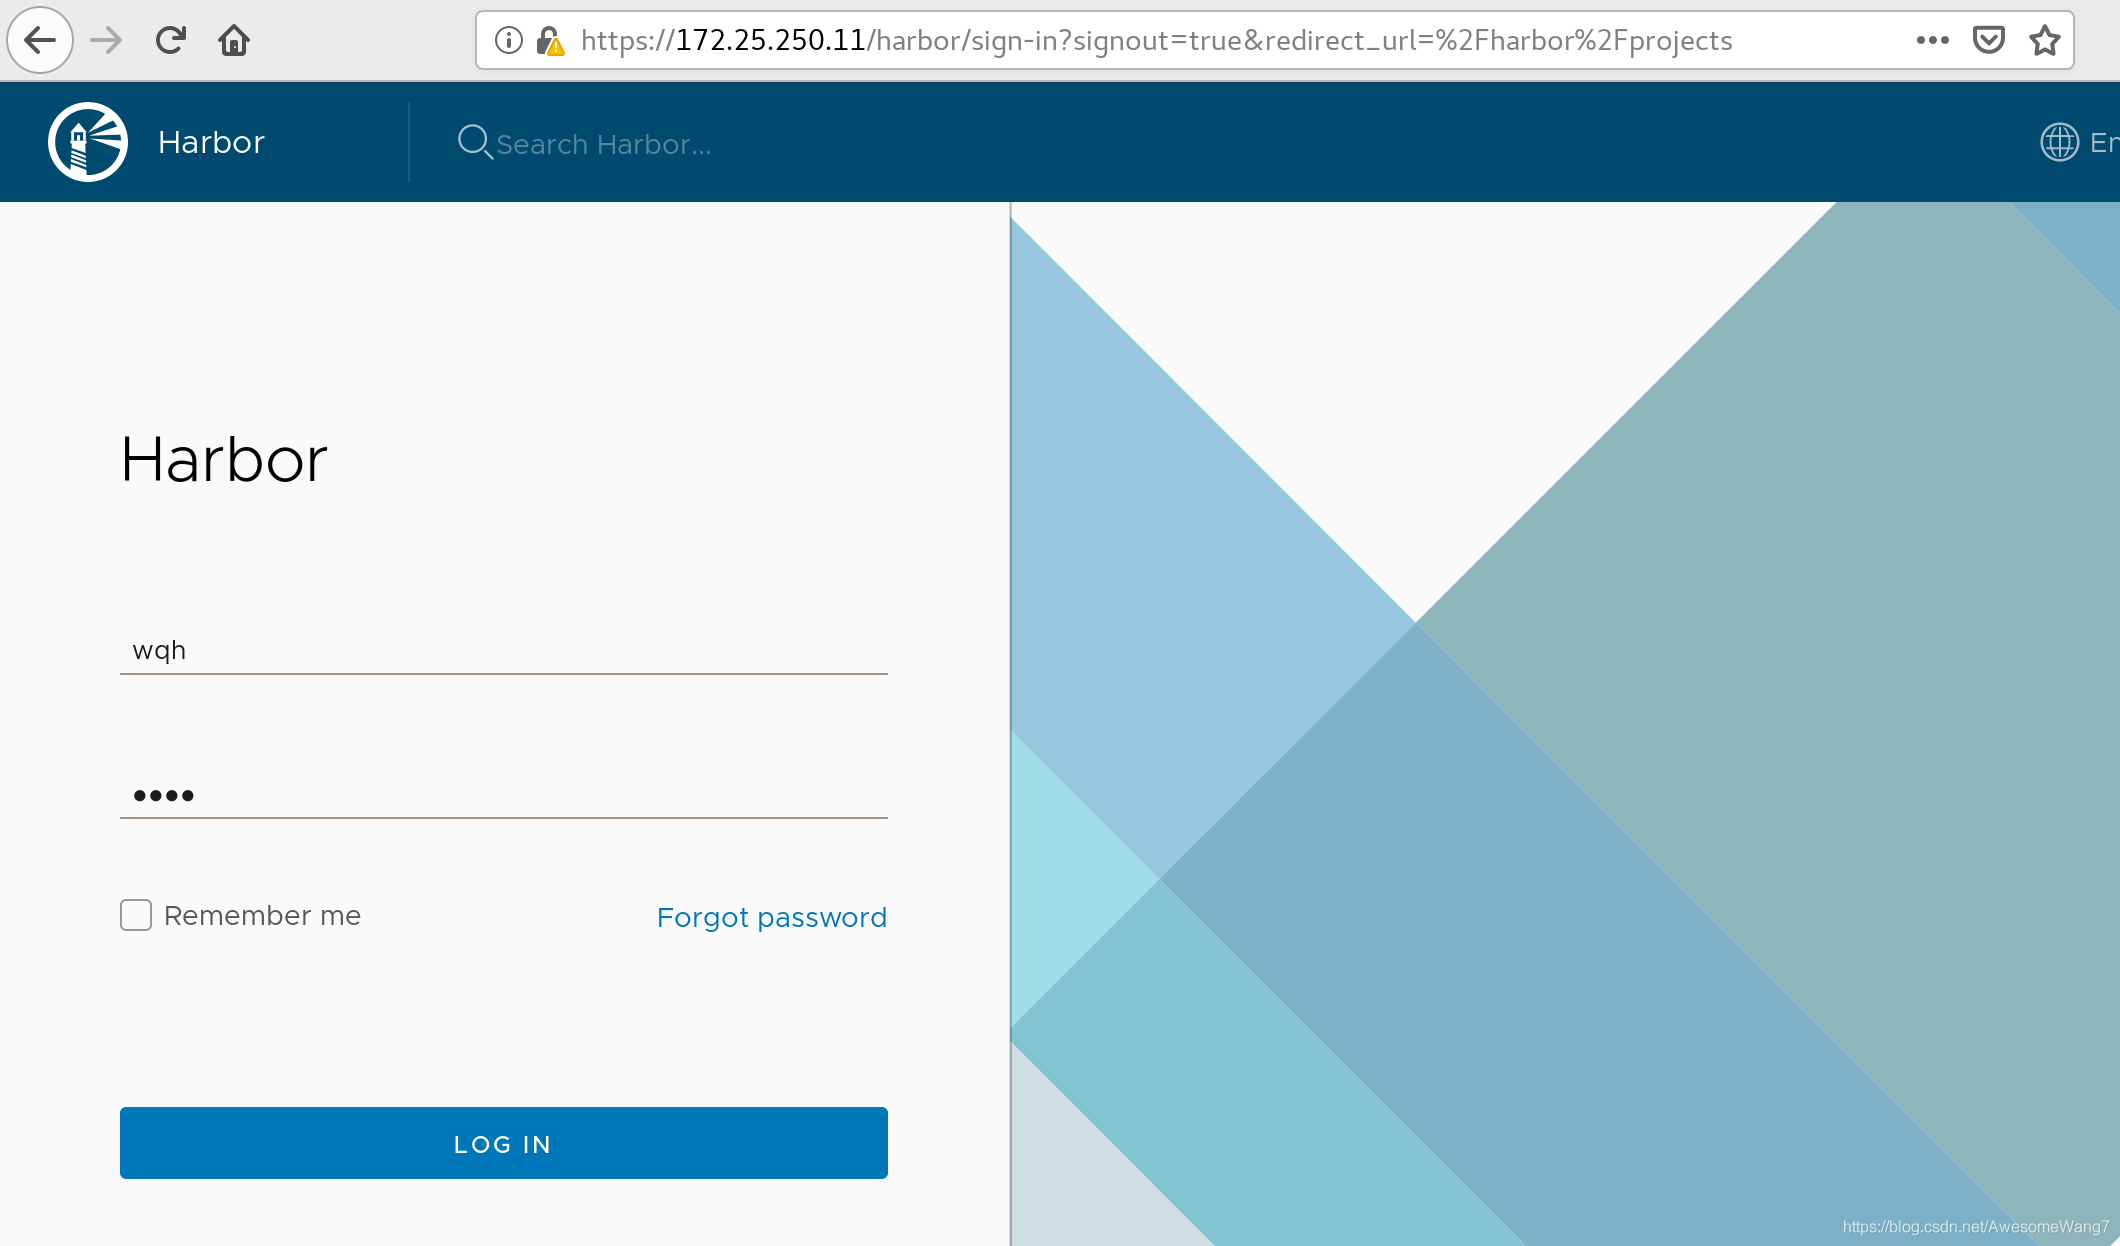
在haoge项目里把wqh这个用户给一个访客身份
[root@server2 ~]# docker login reg.westos.org
Username: wqh
Password:
WARNING! Your password will be stored unencrypted in /root/.docker/config.json.
Configure a credential helper to remove this warning. See
https://docs.docker.com/engine/reference/commandline/login/#credentials-store

Login Succeeded
server2登录wqh
再次拉取
[root@server2 ~]# docker pull reg.westos.org/haoge/game2048:latest
latest: Pulling from haoge/game2048
Digest: sha256:8a34fb9cb168c420604b6e5d32ca6d412cb0d533a826b313b190535c03fe9390
Status: Downloaded newer image for reg.westos.org/haoge/game2048:latest
reg.westos.org/haoge/game2048:latest
[root@server2 ~]# docker images
REPOSITORY                      TAG       IMAGE ID       CREATED         SIZE
nginx                           latest    2560dbd4ee1e   14 months ago   31.1MB
game2048                        latest    19299002fdbe   4 years ago     55.5MB
reg.westos.org/haoge/game2048   latest    19299002fdbe   4 years ago     55.5MB
没问题
但是push是不可以的,因为访客是没有权限的
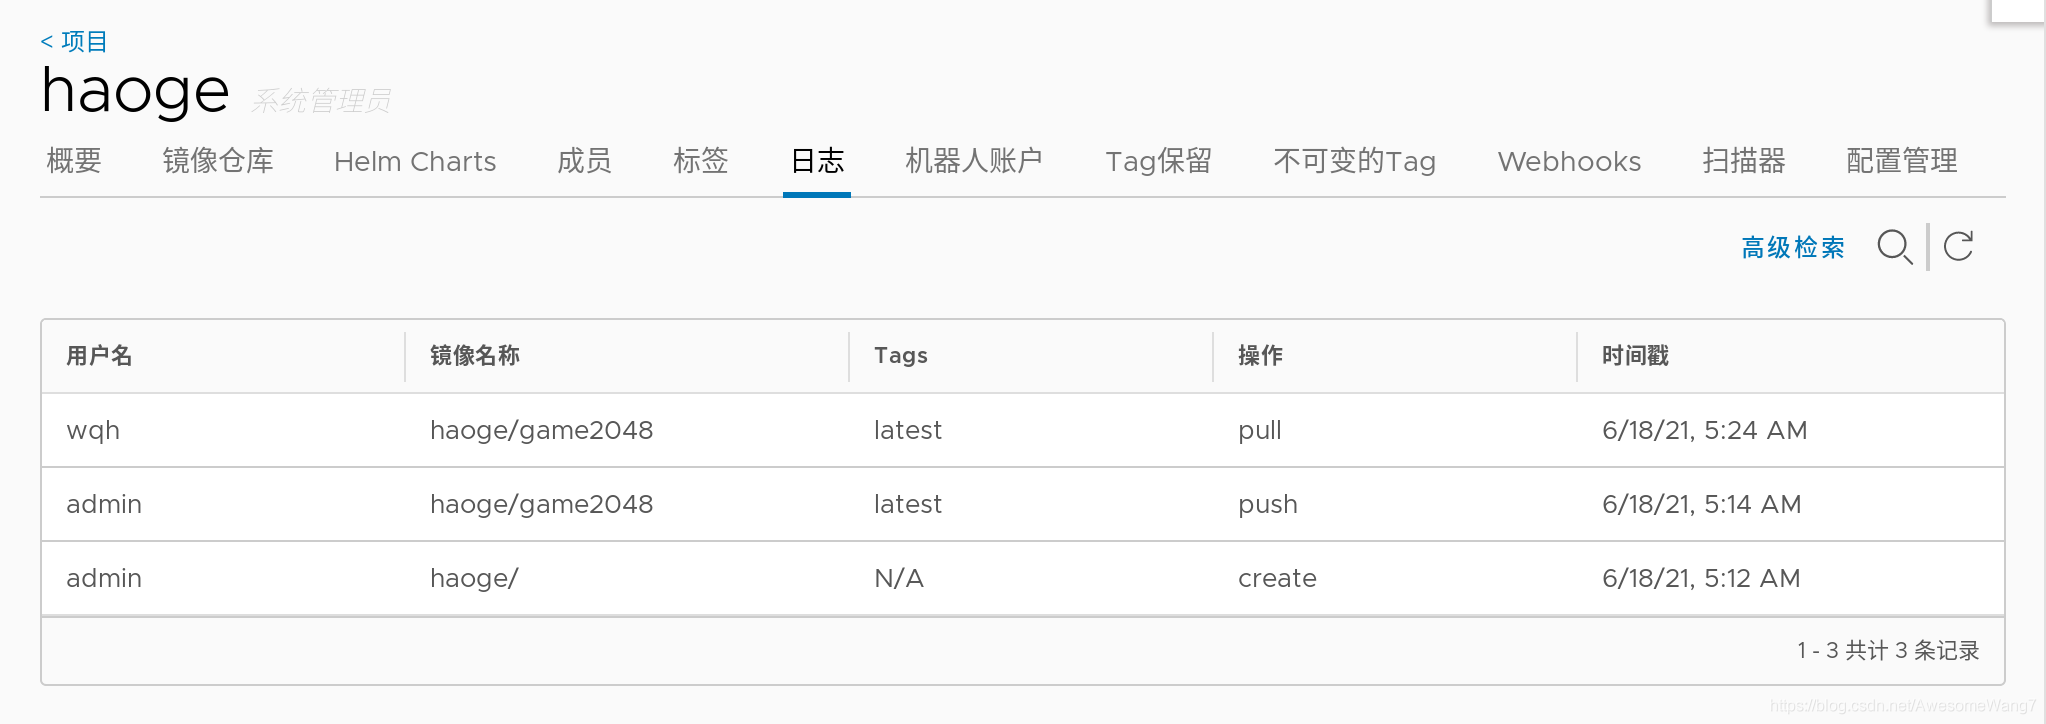
日志可以看到刚才wqh拉去了一个镜像
最后:
去掉镜像扫描和签名功能,这些加快磁盘的消耗
(扫描加快磁盘的消耗)
(之后的实验不需要镜像扫描和签名)
[root@server1 harbor]# docker-compose stop
Stopping harbor-jobservice ... done
Stopping nginx             ... done
Stopping notary-server     ... done
Stopping clair-adapter     ... done
Stopping notary-signer     ... done
Stopping clair             ... done
Stopping harbor-core       ... done
Stopping chartmuseum       ... done
Stopping harbor-portal     ... done
Stopping redis             ... done
Stopping registryctl       ... done
Stopping harbor-db         ... done
Stopping registry          ... done
Stopping harbor-log        ... done
[root@server1 harbor]# docker-compose rm
Going to remove harbor-jobservice, nginx, notary-server, clair-adapter, notary-signer, clair, harbor-core, chartmuseum, harbor-portal, redis, registryctl, harbor-db, registry, harbor-log
Are you sure? [yN] y
Removing harbor-jobservice ... done
Removing nginx             ... done
Removing notary-server     ... done
Removing clair-adapter     ... done
Removing notary-signer     ... done
Removing clair             ... done
Removing harbor-core       ... done
Removing chartmuseum       ... done
Removing harbor-portal     ... done
Removing redis             ... done
Removing registryctl       ... done
Removing harbor-db         ... done
Removing registry          ... done
Removing harbor-log        ... done
[root@server1 harbor]# ./install.sh --with-chartmuseum

[Step 0]: checking if docker is installed ...

Note: docker version: 19.03.15

[Step 1]: checking docker-compose is installed ...

Note: docker-compose version: 1.27.0

[Step 2]: loading Harbor images ...
Loaded image: goharbor/clair-adapter-photon:v1.0.1-v1.10.1
Loaded image: goharbor/harbor-jobservice:v1.10.1
Loaded image: goharbor/redis-photon:v1.10.1
Loaded image: goharbor/notary-server-photon:v0.6.1-v1.10.1
Loaded image: goharbor/clair-photon:v2.1.1-v1.10.1
Loaded image: goharbor/harbor-log:v1.10.1
Loaded image: goharbor/registry-photon:v2.7.1-patch-2819-2553-v1.10.1
Loaded image: goharbor/notary-signer-photon:v0.6.1-v1.10.1
Loaded image: goharbor/chartmuseum-photon:v0.9.0-v1.10.1
Loaded image: goharbor/harbor-registryctl:v1.10.1
Loaded image: goharbor/nginx-photon:v1.10.1
Loaded image: goharbor/harbor-migrator:v1.10.1
Loaded image: goharbor/prepare:v1.10.1
Loaded image: goharbor/harbor-portal:v1.10.1
Loaded image: goharbor/harbor-core:v1.10.1
Loaded image: goharbor/harbor-db:v1.10.1


[Step 3]: preparing environment ...

[Step 4]: preparing harbor configs ...
prepare base dir is set to /mnt/harbor
Clearing the configuration file: /config/log/logrotate.conf
Clearing the configuration file: /config/log/rsyslog_docker.conf
Clearing the configuration file: /config/nginx/conf.d/notary.upstream.conf
Clearing the configuration file: /config/nginx/conf.d/notary.server.conf
Clearing the configuration file: /config/nginx/nginx.conf
Clearing the configuration file: /config/core/env
Clearing the configuration file: /config/core/app.conf
Clearing the configuration file: /config/registry/config.yml
Clearing the configuration file: /config/registry/root.crt
Clearing the configuration file: /config/registryctl/env
Clearing the configuration file: /config/registryctl/config.yml
Clearing the configuration file: /config/db/env
Clearing the configuration file: /config/jobservice/env
Clearing the configuration file: /config/jobservice/config.yml
Clearing the configuration file: /config/notary/server-config.postgres.json
Clearing the configuration file: /config/notary/server_env
Clearing the configuration file: /config/notary/signer_env
Clearing the configuration file: /config/notary/signer-config.postgres.json
Clearing the configuration file: /config/notary/notary-signer.key
Clearing the configuration file: /config/notary/notary-signer.crt
Clearing the configuration file: /config/notary/notary-signer-ca.crt
Clearing the configuration file: /config/notary/root.crt
Clearing the configuration file: /config/clair/postgresql-init.d/README.md
Clearing the configuration file: /config/clair/postgres_env
Clearing the configuration file: /config/clair/config.yaml
Clearing the configuration file: /config/clair/clair_env
Clearing the configuration file: /config/clair-adapter/env
Clearing the configuration file: /config/chartserver/env
Generated configuration file: /config/log/logrotate.conf
Generated configuration file: /config/log/rsyslog_docker.conf
Generated configuration file: /config/nginx/nginx.conf
Generated configuration file: /config/core/env
Generated configuration file: /config/core/app.conf
Generated configuration file: /config/registry/config.yml
Generated configuration file: /config/registryctl/env
Generated configuration file: /config/db/env
Generated configuration file: /config/jobservice/env
Generated configuration file: /config/jobservice/config.yml
loaded secret from file: /secret/keys/secretkey
Generated configuration file: /config/chartserver/env
Generated configuration file: /compose_location/docker-compose.yml
Clean up the input dir


[Step 5]: starting Harbor ...
Creating harbor-log ... done
Creating harbor-portal ... done
Creating registryctl   ... done
Creating harbor-db     ... done
Creating redis         ... done
Creating registry      ... done
Creating chartmuseum   ... done
Creating harbor-core   ... done
Creating nginx             ... done
Creating harbor-jobservice ... done
✔ ----Harbor has been installed and started successfully.----
[root@server1 harbor]# docker-compose ps
      Name                     Command                       State                                        Ports
--------------------------------------------------------------------------------------------------------------------------------------------
chartmuseum         ./docker-entrypoint.sh           Up (health: starting)   9999/tcp
harbor-core         /harbor/harbor_core              Up (health: starting)
harbor-db           /docker-entrypoint.sh            Up (health: starting)   5432/tcp
harbor-jobservice   /harbor/harbor_jobservice  ...   Up (health: starting)
harbor-log          /bin/sh -c /usr/local/bin/ ...   Up (health: starting)   127.0.0.1:1514->10514/tcp
harbor-portal       nginx -g daemon off;             Up (health: starting)   8080/tcp
nginx               nginx -g daemon off;             Up (health: starting)   0.0.0.0:80->8080/tcp,:::80->8080/tcp,
                                                                             0.0.0.0:443->8443/tcp,:::443->8443/tcp
redis               redis-server /etc/redis.conf     Up (health: starting)   6379/tcp
registry            /home/harbor/entrypoint.sh       Up (health: starting)   5000/tcp
registryctl         /home/harbor/start.sh            Up (health: starting)
最终效果
以上就是docker5 全功能harbor的详细内容,更多关于docker harbor的资料请关注脚本之家其它相关文章!